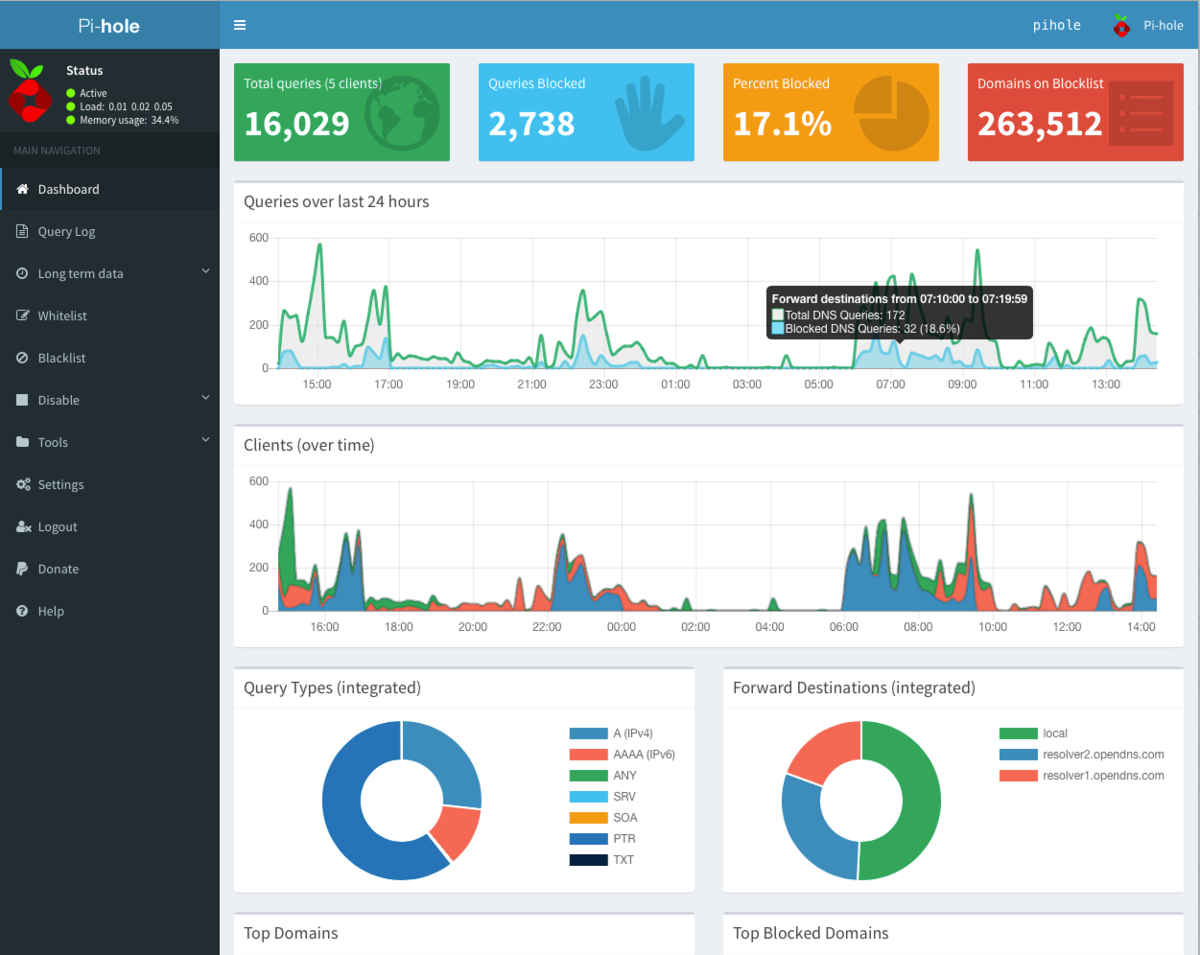
What is Pi-hole?
Pi-hole is a network-wide ad blocker that works as a DNS sinkhole. It intercepts DNS requests and blocks any domains that are known to serve ads, trackers, or malicious content. Pi-hole can block ads on all devices connected to your network, including smartphones, smart TVs, and tablets, without requiring any client-side configuration.

Unlike traditional browser-based ad blockers, Pi-hole filters content at the network level, providing a more comprehensive solution. It also helps improve network performance by reducing unnecessary traffic from ads and trackers.
How to Install Pi-hole
Prerequisites:
- A Raspberry Pi or any Linux-based device (you can also run it on a virtual machine or Docker).
- Basic knowledge of terminal commands.
- A stable internet connection.
Steps to Install Pi-hole
1. Update your System
Before installing Pi-hole, it’s essential to make sure your system is up to date. Run the following command to update your Raspberry Pi or Linux machine:
sudo apt update && sudo apt upgrade -y2. Install Pi-hole Using Curl
Pi-hole provides an automated installation script, which can be run using the following command:
curl -sSL https://install.pi-hole.net | bashThis will start the installation process.
3. Follow the On-Screen Prompts
The script will ask a series of questions to configure Pi-hole. Here’s a quick rundown:
- Select Network Interface: Choose the network interface you want Pi-hole to use (usually “eth0” for wired or “wlan0” for wireless connections).
- Choose Upstream DNS Providers: You can choose from a list of popular DNS servers (like Google, OpenDNS, or Cloudflare), or enter a custom one.
- Block Lists: Pi-hole uses predefined blocklists to filter out ads and tracking domains. You can use the default lists or add your own later.
- Static IP Address: Pi-hole works best with a static IP, which prevents your DNS server from changing when your router assigns new IP addresses. Ensure this is set correctly.
4. Set the Pi-hole Admin Password
Once installed, Pi-hole will ask you to set an admin password to access its web interface. You can also set or change it later using this command:
pihole -a -p5. Access the Pi-hole Dashboard
To manage and monitor Pi-hole, navigate to the admin dashboard by entering the device’s IP address followed by /admin in your web browser. For example:
http://192.168.1.100/adminLog in using the password you set earlier.
6. Point Devices to Pi-hole DNS
For Pi-hole to start blocking ads, you need to configure your devices or router to use Pi-hole as the DNS server. You can either:
- Manually set each device’s DNS settings to point to Pi-hole’s IP.
- Configure your router to use Pi-hole as the primary DNS server, which will automatically route all network traffic through Pi-hole.
Public DNS Servers and Their IP Addresses
When setting up Pi-hole, or for general use, you may want to use a public DNS server. Below are some of the most popular public DNS providers along with their IP addresses:
| DNS Provider | Primary DNS IP | Secondary DNS IP |
|---|---|---|
| 8.8.8.8 | 8.8.4.4 | |
| Cloudflare | 1.1.1.1 | 1.0.0.1 |
| OpenDNS | 208.67.222.222 | 208.67.220.220 |
| Quad9 | 9.9.9.9 | 149.112.112.112 |
| Comodo Secure DNS | 8.26.56.26 | 8.20.247.20 |
| Quad101 (Taiwan) | 101.101.101.101 | 101.102.103.104 |
| AdGuard DNS | 94.140.14.14 | 94.140.15.15 |
Google DNS is one of the most widely used DNS servers due to its speed and reliability. Cloudflare DNS is known for its privacy-focused approach, while OpenDNS provides extra features like parental controls. Quad9 focuses on security, blocking malicious domains, and AdGuard DNS also blocks ads and tracking scripts similar to Pi-hole.
Final Thoughts
Pi-hole is a fantastic tool for blocking ads and trackers across your entire network, improving both your privacy and your browsing experience. It’s relatively easy to install and configure, and it can be customized with additional block lists and settings. By using a reliable public DNS server, you can further enhance the speed and security of your internet connection.


